


Tote Bag Sewing Class
It’s comical how I react when people find out that I sew and then ask me to hem something. I can only sew what I know and in all honestly, in the world of sewing, my knowledge is very limited. This year, one of my goals is to broaden my horizons to learn more and different sewing techniques. I have started following some sewing blogs and finding cool patterns to try. Last month I signed up for a Wool + Wax Tote class at Sew to Speak taught by Nicole from Pokeycan. I’m not going to show the pattern, as it is not mine, but will take you along to some of my “sewing firsts” that I knew I would be excited to learn when I read the class description.
If you have never been to Sew to Speak in Worthington, you really need to visit. I bought my Juki machine there a year ago and I love stopping in just to get inspiration. They have classes for anything fiber related and sell fabric, yarn and sewing machines. You can find a list of their classes here.

First thing’s first – pick out the fabric! Looking at different fabrics is a huge love of mine. I could search through fabric for hours, different colors and prints brings me joy. Textures of fabric are so interesting to me. If you know me, you know that I will ask any stranger if I can feel a fabric that they are wearing which is ironic considering that I have severe social anxiety. Also, those who know me know that I can’t match two fabrics together to save my life! I am a huge fan of black or brown pants and a simple print shirt. Color on color confuses me and usually has me looking like a clown.
I read the instructions to find out the weight of fabric that I needed and asked the fabulous ladies at Sew to Speak to point me in the right direction. After looking through their amazing selection of fabric I chose one that I loved. But the pattern was on a light background and I quickly remembered that I am clumsy and a mom and a pet owner. That fabric was too light and would have gotten dirty the first day I used it. So I changed my path and searched for something darker but just as fun. I love the beach and warm weather so these palm leaves made me happy. I paired it with some dark blue denim that was heavy enough for a bag base. The lining of the bag had me completely stumped! I looked around the shop three times and couldn’t find anything that caught my eye. Then, I saw an already made bag for an upcoming class, the Portside Duffle, that also had the same palm leaf fabric. I looked inside and found the perfect color.
With the fabric cut, all I had left to do was choose the handles. I am allergic to leather. I found this out the hard way when I wore leather heeled sandles for my wedding. Do you know how hard it is to scratch your feet without getting tickled? It’s awful to have your feet itch SO much. I decided to steer clear of leather as well as faux leather handles and chose a woven cotton strap. It’s sturdy enough yet soft enough to use on a bare shoulder in the summer.

Notice my Studio Chopstix sewing tote, Sweet Butter Cup Designs cold drink cup and my own handmade rope bowl!
I packed up my Juki and sewing supplies and headed to my first sewing class since I was 7 and in Girl Scouts. My excitement out weighed my nervousness. There were two things that I wanted to learn from this class outside of never sewing this pattern before: installing rivets and squaring off a bag bottom.

This bag pattern allowed me to use rivets twice in the process, once to decorate the pocket edges and second to attach the handle straps. This first instance was technically easier because I didn’t have to match two different fabrics. I picked out some antique brass, flat rivets in a small size. Since they were on the small size, I didn’t feel that I need to measure where they needed to go. Eyeballing the corners and center of the pockets, I used the handheld punch and created a hole that matched the size of the post of the rivet. I pushed the post through and snapped on the other end. With the rivet post up, I placed the whole thing into the awesome pink punch and put all my weight into it! Tada! It was so surprisingly simple that I don’t know why I have waited so low to try this.

Before I get to the second set of rivets, let’s talk about the bottom of the bag. If you didn’t know, I make and sell small wristlets. I don’t usually make the bottom flat but after learning how easy it is, I may just try it on the wristlets that I sell. In this pattern, after you match and sew the side seams, cut out two square pieces on each side of the bottom, then match what turns out to be a diagonal seam. In words it sounds so very complicated but after physically sewing the first side, my mind was blown. I finished the second side and turn the bag right side out and marveled at my beautiful flat bottom bag.
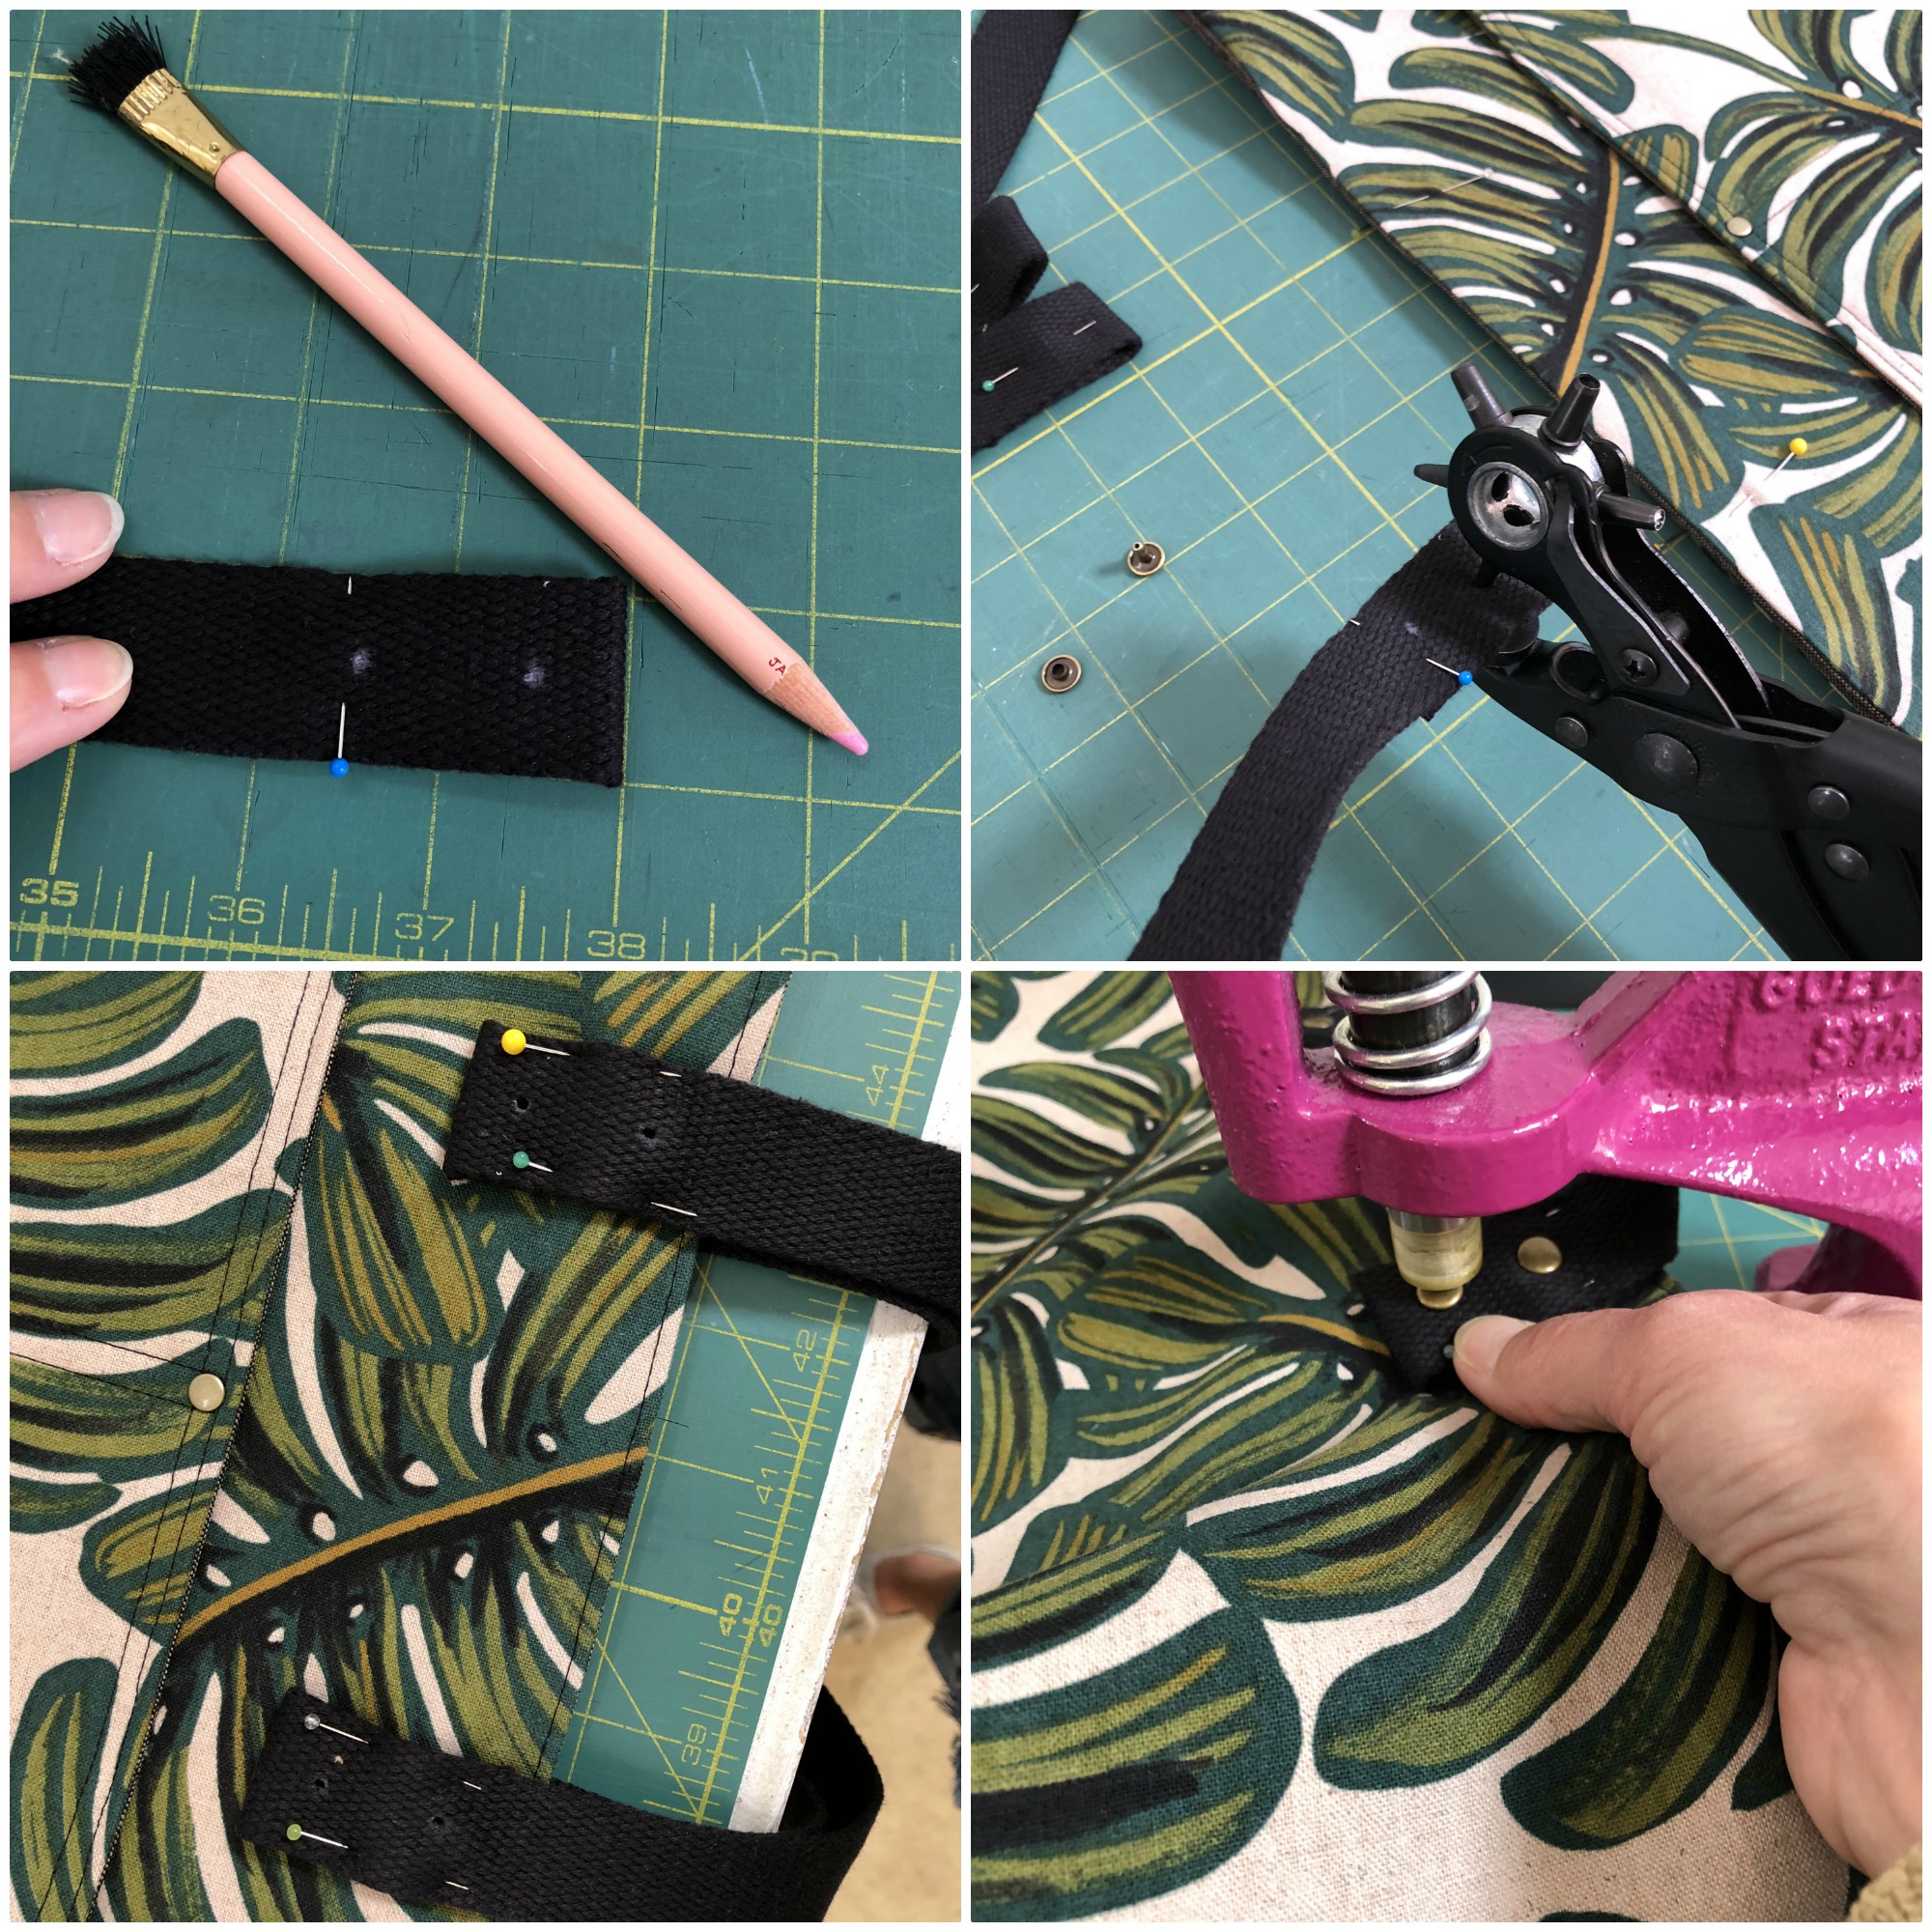
I sewed my pocket onto the lining, added my lining and turned everything right sides where they should be. After closing the inside seam and top stitching the top of the bag, it was time to add the handles. I chose the same color rivets as I did on the front pocket but the next size bigger. Measuring from the center out, I landed on a spot to place the straps. I folded the strap under enough to allow two rivets to be placed evenly and marked those spots with chalk. The punch crunched easily through both layers (I rather enjoy punching holes in things!). I put the punched strap on top of the bag and centered it on the mark that I made previously and pinned it in place. Next up was the punch again! I used the holes that I already made and punched through the bag. Just like before, I put the rivet post through the hole, capped it and placed it into the machine for a good press. Once all 8 were done, I was ready for a quick photo shoot!

I had so much fun making this bag. Even though I sew every day, it was great to get out of the house, out of my comfort zone and make something new. Nicole is a great teacher, very patient with all of my silly questions. She was also very knowledgable so I learned all of the “whys” and not just the steps. You can find Nicole's handmade items at Pokeycan on Etsy.

